30 Jul 2014

Most Repurchased Products aka The Good'uns


Happy Hump Day Love-bugs!

This post started out it's life as a kinda 'My Holy Grail Products' post but once I started rummaging through my makeup stash I started to realise that some of the products I considered part of my 'Holy Grail' weren't products that I'd returned to time and time again over the years... fail.

Your most repurchased products are clearly the ones you can't live without right? So here are my top 5 repurchased products - aka. what my face can't live without.

1. Simple Wipes
I know, I know... you're not supposed to use wipes to remove your makeup. I'm probably committing some form of beauty blogger felony by including these in my most repurchased items, but geez guys I go through these things like nobodies business! Just to clarify, this isn't my only method of removing makeup, I do use cleansers and the likes - so don't shone me! Haha. These are the only makeup wipes I've tried that don't irritate my skin. A few weeks back I found myself using one of the 'Yes To Cucumber' wipes and they stung the crap outta my face - no thank ya! Simple wipes are super refreshing and do really help to get the guts of your makeup off before you go in with another cleanser! I always find great 2 for 1 deals on them too.. so why not! :P

*Top Tip - If you find your wipes drying out, all you gotta do is store them upside down when you're not using them and it returns the moisture... you're welcome. :P

2. DUO Glue
Without a doubt, this is my favourite glue to apply false lashes with. I've been using it for years and completely swear by it now. This is the white version but they also have a black glue which is fab if you're a bit nervous about getting glue all over your black liner - happens to the best of us! It's super long lasting - there is literally no chance of your lashes popping off through out the day / night. After having this as a permanent member of my makeup collection for so many years, there's no chance of me falling back into the habit of using the glue that comes with lashes! These little tubes also last a life time, so have no fear of running out of glue! A must have in tool in your makeup kit!

3. 'They're Real!' Mascara - Benefit
Now I couldn't do a 'favourite' type of post without including my little babe from Benefit, ya'll know about my obsession with the brand by now! Haha. This is by far my favourite and most repurchased mascara EVER... I go through mascaras like crazy as I like to test different ones out but this is always the one I return to. The only negative I would have had about it would have been the difficulty involved in trying to remove the stuff after a day of wear - but now we've got the 'They're Real Remover' ... sorted! It elongates the lashes (a hell of a lot) and is definitely worth the hype!

4. Maybelline 'Fit Me!' Concealer
I tend to forget how much I love this concealer when trying others out but once I re-discover it, it pretty much becomes another limb. Haha. It's supposedly a dupe for NARS Radiant Creamy Concealer, which I also love... but I think I might like the thinner consistency of this a tad more. (Please don't shoot me beauty bloggers. Haha) It's almost like a more full coverage / more pigmented foundation. It also costs less dollah, which is always good!

5. Rimmel Exaggerate Liner
Last but not least... my favourite liquid liner ever. I literally compare any other form of gel/pen/liquid liner to this stuff and so far nothing seems to have beat it in my eyes. It's jet black and ridiculously easy to apply. The pen is almost like a felt tip, so it's just like drawing with a marker on your eyelid. Haha. It doesn't dry out, it's super easy to remove and it's inexpensive. Thank you Rimmel for this little gem. I've been using it for years and always go back for more. If they ever discontinue this stuff you'll find me curled up in a ball crying in a corner somewhere.

And that's about it lovelies!

What are your most repurchased products?
Do you own any of the little gems above?

XO, G.


Follow Me Fellas & Felines!
Share:

29 Jul 2014

How I Create A Big Bouncy Hollywood Style Curly Blow-dry


Oh hey there love-bugs!

Today, I thought I'd have a bash at a little hair tutorial. I've always been a huge fan of a big Hollywood style curly blow-dry and was sick of having to go to the hairdressers just to achieve the look. So, I got my thinkin' hat on and decided to watch (... or stare like a creep) intently as my hairdresser blow-dried my hair, got my bootaaay to somewhere that sold round brushes and practiced practiced practiced until I got my fro to look a bit like this!

I've gotta admit, I've blow-dried my hair using round brushes for as long as I can remember - no thank you straighteners... they've done my hair enough damage to last 3 lifetimes. Haha - so this might have given me a little head start in the blow-dry department! But fear not... It's really not all that difficult.

So if you'd like to achieve my big bouncy Hollywood style curly blow-dry have a look through the rest of this picture heavy post... :P


Step 1:
Wash your hair (Duh. Haha.)
I use the Great Lengths Shampoo to keep my extensions happy (you can read about my extensions here) and Aussie 'Take The Heat' Conditioner which acts as a big hug for heat damaged hair & also prepares your hair for being blasted by the hairdryer.
Brush through your hair and apply another heat protectant - I like Bed Head's 'Some Like It Hot' Heat & Humidity Resistant Serum.

Step 2:
Dry the roots of your hair completely and leave the mid-lengths and ends slightly damp. Sometimes I just like to let the mid-lengths and ends air dry while I do my makeup to avoid any unnecessary heat!


Step 3:
Section off your hair just above your ears and brush through to make sure there are no knots.


Step 4:
Get the round brushes at the ready!
I use a selection of different round brushes. I'd definitely recommend these pink Head Jog brushes if you can get a hold of them though. I've never had a brush that dries my hair like these do! Little pink miracles!


Step 5:
Section your hair into smaller sections about an inch / an inch and a half thick. (Trying to be specific... I'm probably failing. Haha.)

Step 6:
Place the brush about 3/4's of the way up the section and dry down-wards using your hair-drier (keep repeating until this section is dry).
When you get to the bottom, rotate the brush in your hand whilst still applying heat with the drier from a distance. Then roll the brush up the section of hair as you would with heated rollers.

I've included a load of photos of this process below if you haven't got the gist of it! :P


Step 7:
Now all you have to do is repeat this on the remaining sections of your hair until you're left looking a bit like this...


Step 8:
It's not necessary but I like to leave the brushes sit for a little bit until they cool down. Obviously, you can work on the right side of your head while the left side is cooling to speed it up a lil'!

Step 9:
Finally, you just unravel your hair from the brushes and gently brush through the curl and what you're left with is a fab bouncy Hollywood style curly blow-dry!


And there ya have it!
I love rocking this style on a daily basis but it looks super glamorous when you're dressed up and ready to hit the town or a special event!

Have you ever tried to create a curly blow-dry yourself?
Lemme know in the comments blow!

XO, G.


Follow Me Fellas & Felines!
Share:

28 Jul 2014

How I Maintain My Summer 'Tan'


If you've had a little look-see at my 'Pale Girl Tanning' post or you've just noticed the sudden shift in my skin colour, you'll probably have guessed that my St. Tropez Gradual Tan has become a spare limb of sorts in the last couple of weeks. It's been unnaturally hot in Ireland this Summer and I just can't do Summer without a 'tan'.

The one downside to a lot of false tanning is the upkeep of the stuff! Ain't nobody got time fo' patchy & uneven tan and even though I've found the St. Tropez Gradual Tan to be the best at fighting the patchiness, once you find yourself tanning a lot the build up of tan can cause a little bit of unevenness... So here are 2 products I've found really help me to stay the colour I'd love to be. Haha.


African Paradise Body Conditioner - Lush
You might have seen me yap on about how lovely this stuff is when I gave you all a sneak peek of the Lush Summer Collection a few weeks back and yes... I'm still lovin' it! This little piece of paradise in a tub is an in shower body conditioner packed full of African oils, butters and fruits. This is the first step I take in my tan maintenance. I apply it to damp skin and then slightly rinse just before I hop my way out of the shower (I don't literally hop...). I can't begin to explain how gorgeous it makes your skin feel... and the scent! THE SCENT! Its so yummy and deepens as it soaks into your skin. Let's put it this way, the stuff is that lovely that I've even got my brother addicted. Haha.

In a nutshell, anything that is going to moisturise your skin is going to help your tan's longevity & I'd definitely pop this at the top of my skincare / tan maintaining faves!


Huile Prodigieuse - Nuxe
I've gotta thank my Moma for introducing me to this dry oil when I had my little sun burn disaster a few weeks back (... you can find that story in this post). This is actually a multi-purpose dry oil, you can use it on your face, body and hair - you should try this as a form of a hair mask, silky smooth goodness! It claims to nourish, repair and soften skin and hair and that it does love bugs! You would imagine with it being an oil that it'd be super greasy and feel like a film just sitting over your skin... not so! It sinks into your skin and leaves such a gorgeous finish. My whole family are absolutely addicted to this stuff!

So those are my two little tan maintaining secrets!
What do you use to up-keep your tan?
Let me know in the comments below!

XO, G.


Follow Me Fellas & Felines!
Share:

25 Jul 2014

Introducing ... | Charlotte Tilbury's Wonder Glow & Magic Cream


Yaaassssss!

That's right lovebugs, I've managed to get my hands on some of Charlotte Tilbury's magical goodness! I've been super excited to try these little gems out since they made their grand entrance into Brown Thomas, Dublin in the last couple of weeks.

It seems like I've been hearing about CT's products forever and after a lot of lusting and drooling via the inter web, I can finally drool over them face to face... up close and personal!

(On a side note: If you're thinking of picking up these little beauts in BT, they've got a BUNCH of special offers on the go to promote the CT line! I've got a free make over in the bag... which also means I'll get a sneak peek at the makeup line before it hits the shop floors! WINNING!)

Without further a due, take a look at CT's wonder products! ...


Magic Cream
I think it goes without saying but CT goes all out with her packaging! When I opened this box I felt like I was gonna find an engagement ring inside. haha. - but the little tub of magic cream is just as bootyful! Charlotte's Magic Cream is tagged as being a treat and transform moisturiser. It's full of collagen-boosting, anti-age ingredients - in normal language, that means see yuhhh to your dull and blah skin! It leaves your skin with a flood of moisture giving you a fabulous glow in a matter of seconds. The packaging also contains instructions on how to perform Charlottes Pro-Collagen Wonder Workout - it's basically a 5 minute facial that boosts circulation and reduces puffiness (lifesaver!!!).

I've only used the stuff for a week but so far so good! The texture of it really reminds me of Ponds Cream if you know what that is! It leaves your skin feeling ahhhmazing - nice and plump and definitely more awake! A little goes a long way with this cream so I can see this 50 ml tub lasting awhile!

(Fact of the day: Charlotte herself has been testing and developing this product backstage at shows for over 20 years and has got models and regular clients of hers hooked on the stuff... Yes, that means it used to go missing during shows because there was nowhere else models could pick up the miracle cream.)


Wonder Glow
You all know about my little obsession with illuminators by now - well say hello to my latest addiction! It claims to be a cross between an anti-age elixir and a complexion-enhancing light diffuser to give your skin an instant 'spotlight' effect - lots of big words. Haha. In a nutshell, like any other illuminator this stuff gives your skin the appearance of glowing & hydrated skin... yes, I mean that fab dewy effect! This golden illuminator (yes, the product looks like liquid bronze/gold) apparently blurs away lines and fills your skin with luminosity! So far I've used this as a regular illuminator but I think it'd look gorgeous with zero makeup when you're on holiday!

Downside? They're an expensive little bunch to pick up.
Charlotte's Magic Cream retails in Brown Thomas at €90.00 for a 50ml container.
Wonder Glow retails in Brown Thomas at €49.00 for a 40ml container.

Don't get me wrong, the products are fab & you'll definitely fall in love with the Magic Cream when you test it, but if you're feeling a little sceptical it'd definitely be worth your while asking for testers!

Have you tried out any of Charlotte Tilbury's miracle products?
Let me know in the comments below!

XO, G.


Follow Me Fellas & Felines!

Share:

22 Jul 2014

Ballin' | Debs Makeup Looks


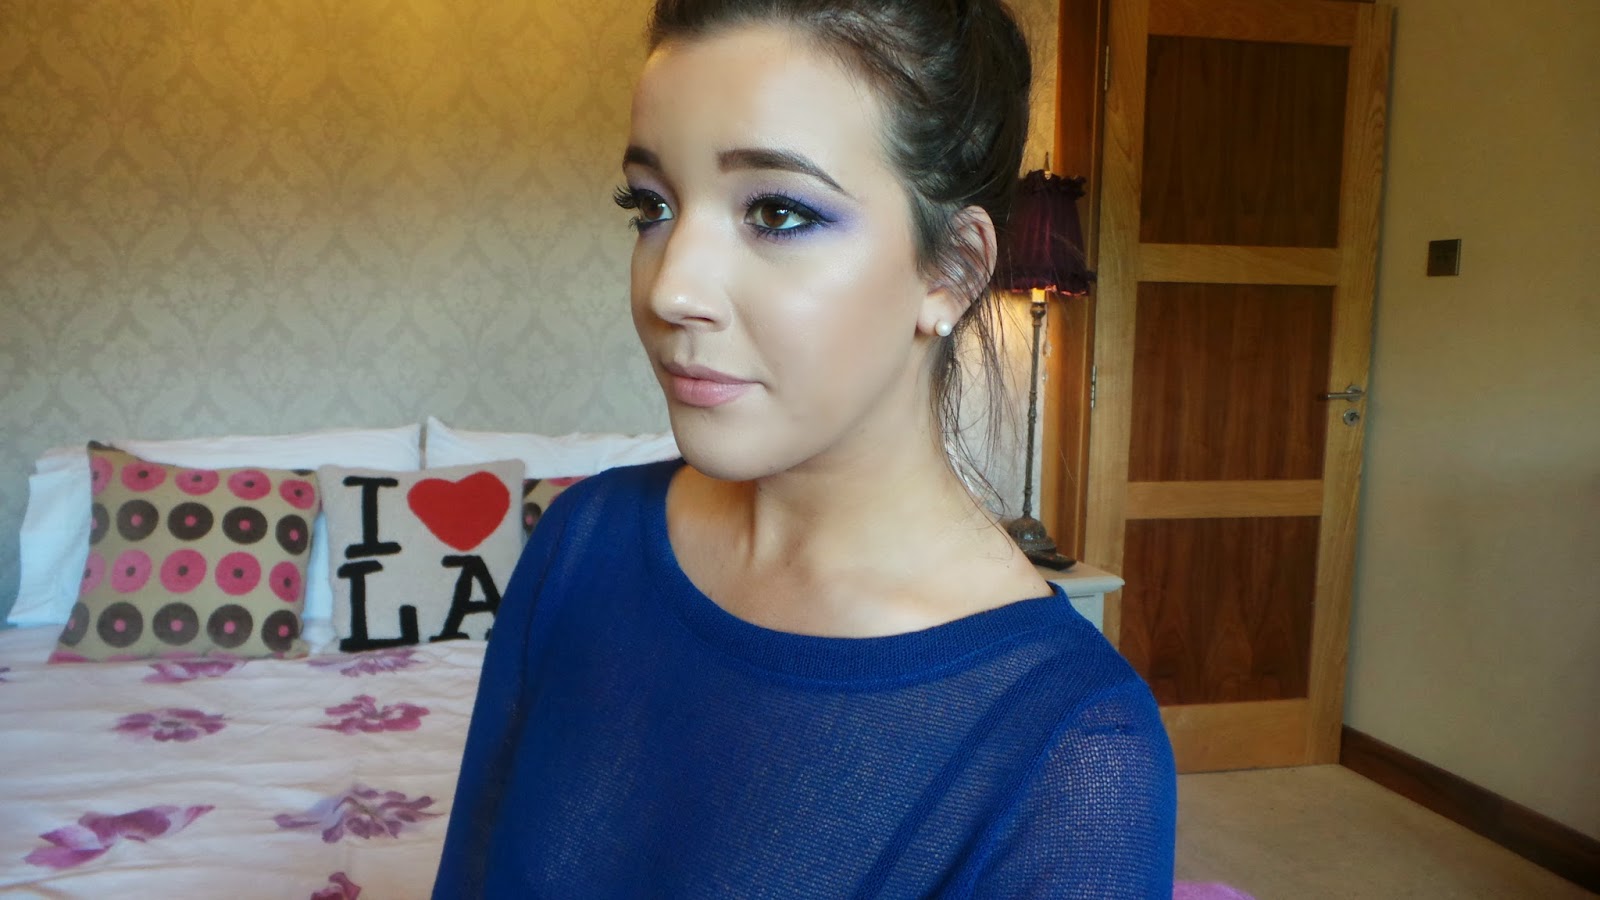
With Debs season looming (yes gals, it's right around the corner and already finished for some of you), I thought I'd stick up some Debs-style makeup looks using my new goodies from my Inglot Haul! As you can see, I kinda let the pigments do the talking for these looks - they're just too pretty to hide!

Look 1
I can't tell you how much I'm in love with these purple shadows!! So so so so pretty. Like you need them in your life! I kept the rest of the face pretty neutral with a stoney lip colour, "Patisserie" from MAC and a little contouring and that was about it! I thought I'd let the eyes do the talking for this one!


PRODUCT LIST

BASE
Girl Meets Pearl (Illuminator) - Benefit
HD Foundation (120) - Make Up For Ever
Full Coverage Concealer (5) - Make Up For Ever
Translucent Powder - Callanberry
Loose Setting Powder (Pale Yellow) - Bobbi Brown
Uninterrupted (Eyeshadow as Contour) - MAC

EYES
Browzings (Light) - Benefit
Soft Ochre (Paint Pot) - MAC
346  & 441 Shadow - Inglot (In the crease & lower lash line)
377 Shadow - Inglot (Outer Corner & lower lash line)
393 Shadow - Inglot (Brow Bone)
180 Pigment - Inglot (Lid)
Black Kohl Liner Pencil - Water line
Exaggerate Liner - Rimmel
Oh Honey Katy Perry Lashes - Eylure

LIPS
Spice Lip Liner - MAC
Patisserie Lipstick - MAC

Look 2
For this look I decided to go a little more grungy and use some warm brown tones and a burnt orange pigment. I stuck to the same lip colours again... even though they colour looks slightly warmer with the darker eye. It's a little more Autumnal.. but I like it!


PRODUCT LIST

Lips and Base same as above - easy peasy!

EYES
Browzings (Light) - Benefit
Soft Ochre (Paint Pot) - MAC
Uninterrupted Shadow - MAC (In the crease & lower lash line)
327 Shadow - Inglot (Outer corner, crease & lower lash line)
232 Pigment - Inglot (Lid)
Black Kohl Liner
Oh Honey Katy Perry Lashes - Eylure

And that's about it guys! Make sure to keep checking back at my Facebook & Instagram accounts - I post my makeup looks there first! 

On a side note... as I've now completed my makeup course I'm available for makeup applications if you're local to Monaghan! If you'd like any more info contact me by e-mail: grace.edenny@gmail.com!

XO, G.


Follow Me Fellas & Felines!!

Share:

One Of My Biggest Fears...


Hello lovebugs!

Hope you're enjoying my little corner of the internet this week! I feel as if I haven't posted some form of a lifestyle post since "My University Experience"... and, well, I'm sitting here in bed on my own... at 9 o clock... on a Saturday night (yes I'm writing this post in advance.. I really can't be tamed) and there's no time like the present!

I'm not sure if you can really even call this a lifestyle post - maybe it's a little more of a stream of consciousness kinda thang (yes, I learned that phrase in College - big words. Haha). I've been doing a lot of thinking recently. I know that sounds super deep and very cliché, but with me finishing College this year I've been trying to figure out what's next? Hence, all the thinking. Haha.

Do I want to look for an internship? Do I want to apply for a few part-time jobs in retail? Do I want to go back to College and further my education? ... Or do I want to be the next American Idol - Haha. I joke, I joke. But to be honest, I can't say for sure right now what I want to do and I don't even know if that's normal. Sure, I'm doing a few extra courses in my spare time that are really helping me to decide, but does it usually take people awhile after they leave College to figure out what direction to take? ... Anyhoos, all of this 'thinking' I keep yappin' on about made me super aware of one thing that scares me more than any boat (yes I'm afraid of boats - ferries that is), snake or height could.

One of my biggest fears is disappointing other people. Not myself... others.

Saying that actually sounds ridiculous! I'm not a weirdo, I promise - Haha - but I swear that this is one fear that has stuck with me for so long. When I was studying for my Leaving Cert (my final exams before Uni) I was afraid of not getting A's & B's... not because I wouldn't get into my course in College, but because I was afraid of disappointing my teachers or my parents. I was afraid of not meeting their expectations, when realistically they all just wanted me to do my best! I worked myself up into such a massive frenzy that I was having breakdowns... a lot, more than I'd care to admit! What is that? I actually feel like a complete tool writing that! Haha. It happens with little things too - blogging included. When I haven't blogged as much as I'd like to in a week, it really bugs me because I feel like I'm letting down anybody who reads my little baby! :P

So it's all come and hit me right in the smush again this week... I'm starting to worry about what my next step is and although I'm not freaking out as much as I would have when it came to exams over the past couple of years, there's still a little somethin' somethin' in the back of my mind worried that I won't do what people expect me to do, or that they'll be disappointed... or they'll have something negative to say about my choices.

...
And that's about all the depth that I can handle for tonight! Haha. Clearly chilling in my room does nothing but make me think! :P I don't actually know if this is going to make sense to anyone but here's hoping it does! I can't be the only one with that fear! Haha.

Hopefully you didn't mind me straying from my usual posts and that this little ramble didn't bore you too much!

If you've got any fears you feel like sharing pop them on down in the comments below so we can chit-chat!

XO, G.


Follow Me Fellas & Felines
Share:

Little Gems | My Most Worn Jewellery


Let's face it, when it comes to jewellery I'm a little bit of a magpie! Give me something shiny or sparkly and you're almost guaranteed I'll be coming home with it! With that said, I thought I'd put together a little somethin' somethin' showing you the little gems that I wear the most - yes, you can be sure that you'll find at least 1 of these little babies on me everyday.

Necklaces
When it comes to necklaces I tend to opt for either pendants or statement neck pieces - there's not really much of an in-between!

In the pendant department, these two are my favourites! I've had this Tiffany pendant for I don't know how long... honestly though, it's probably around 10 years old. It was my first expensive piece of jewellery and dear god has it stuck with me. It still looks as good as it did when I first got it and it goes with everything. What I like most about it is the dog tag style - super quirky - just how I like it!

Then you've got my more recent pendant. This Michael Kors Key Pendant was a present for my Momma & Poppa for my 21st Birthday. I thought it was such a cute gift idea considering people usually get given key's on their 21st Birthday. I usually layer this with the Tiffany pendant. It's delicate but still makes a statement!


Then you've got the big dawgs! Neck Pieces!

Without a single doubt, this is my most worn necklace - it literally dresses up anything and makes you feel like an absolute lord in the process! Again, this Maui neck piece is years and years old. More recently, you've probably noticed similar designs in River Island and even Penny's / Primark - they were super popular for awhile. I've also got a bangle and a set of earrings from the same collection and good lord are they gorgeous! This is a pretty heavy duty neck piece doused in big statement gems and anywhere I go I complimented on it!


Watches
I tend to wear watches more in the Winter... don't ask me why. I would include my FAB Michael Kors Gold & Tortoiseshell watch but unfortunately it's been out of commission for awhile due to one of the pins in the link going walkies! I'll get it fixed eventually. Haha.

Other that that, these two watches get the most mileage and both were gifts from my lahhvely other half - he's got good taste... or he's a good listener ;)

First up is the large faced Michael Kors watch. It's got a navy leather strap and loads of lovely gold detailing. Usually I wouldn't be in to this type of watch but it actually looks super chic & quite masculine on - something I like in a larger faced watch!

Then you've got my little Marc by Marc Jacobs watch. I had been eyeing this up for ages around Christmas & woke up on Christmas Day to find this waiting under the tree! If you know me, you know I've got a thing for Marc Jacobs - everything is so quirky. The face of this watch is just the best thing ever invented! I mean, look at those little bunny ears!!


Bracelet
I'm all about dainty bracelets and these three essentially never leave my wrist.

The Red Evil Eye bracelet is from Marc Jacobs, the next Evil Eye bracelet is from Ingenious (Haul HERE) and the little dragon faced bracelet is from Mulberry (which I bagged for a discount in Kildare Village).

I can't say much about these little lovelies only that I literally never take them off.. they are the bomb diggity.


And that's about everything! I tend to keep these in rotation simply because I know they work with everything - lazy, I know - but I always means that I'm never stuck for accessories!

What's your must have piece of jewellery?
Let me know in the comments!!

XO, G.


Follow Me Fellas & Felines!
Share:

21 Jul 2014

Bene-lovin' | 3 Benefit Products You Need In Your Life


Heyuh Ladybugs! Welcome to another week on the blawwg!

If you've been reading this little corner of the the internet for awhile then you'll know that my love for Benefit Cosmetics goes deep and is endless - I include something from them in most of my giveaways! I know some people look at Benefit as a bit of a gimmicky brand... yes I know they put a lot into their packaging, but they do have some real gems! So if you've never tried Benefit's products before and are a little unsure of how to break your Bene-ginity (that was pathetic. haha), here are my top 3 picks at the minute!

'They're Real' Mascara
This product is more than likely Benefit's most successful product EVER... in the world. Haha. Really though, it is a great mascara! It's jet black, super long wearing and the wand is great for getting at those hard to reach lashes (especially your bottom lashes - no clumpy black smudges)! Before they released the 'They're Real' Remover this year, I probably would have been a little apprehensive of 100% recommending this mascara as it's near impossible to take off, but with the addition of the remover it's easy peasy! I can 100% say that this is one of my favourite mascaras.. if not my favourite!

Girl Meets Pearl
This is a bit of an odd one to include in my favourites but I've been getting so much mileage out of this sweet thang over the Summer! I like to use Girl Meets Pearl 1 of 2 ways - on the high points of my face underneath my foundation, or mixed with my foundation. I briefly mentioned in my 'Summer Beauty Essentials' post that this stuff is part of my dewy skin hack for the Summer time! Obviously with an oily complexion the word dewy sounds like a gals worst nightmare, but this little illuminator gives the illusion of glowing skin without feeling oily and disgusting. Haha. It's gorgeous subtle golden glow is faboosh!

The POREfessional
Another product in the 'Benefit Best Sellers' category... and for good reason! This primer is actually the only primer that has ever done it's job properly for me... and I've tried a few that are supposedly 'amazing'! It definitely minimises the look of pores and smooths out fine lines giving your foundation a lahhvely silkily smooth base to sit on! What I love most about it is that it's oil free and although it doesn't completely stop your skin from looking oily throughout the day (what can?), it definitely helps to give your makeup a bit more longevity!

What do you think of Benefit's products?
What are your top 3 picks?

Let me know in the comments!!

XO, G.


Follow Me Fellas & Felines!
Share:

18 Jul 2014

Great Lengths Hair Extensions | My Experience & Opinion


It's Friday, Friday... gotta get down on Friday! .... LOL
Welcome to the weekend love-bugs!

If you follow me on Instagram or Twitter then you clearly know by now that these long, luscious locks don't come naturally to me. Yes, for the past 2 years or so, I've spent my time sitting in the hairdressers every couple of months for hours on end getting little strands of hair glued to my own... sounds appealing doesn't it? Haha. Honestly, I think there may only be 1 post on this blog where you're able to get a glimpse of my actual hair (good luck finding that. Haha).

Anyhoos, this week the time had come for my old extensions to come out and for my new ones to get glued in. Considering I get asked so often about my extensions; where I get them done, how much they cost, how long they last, what I think of them .... yada yada yada, I thought that now was as good a time as any to scribble up a blog post and let you in on my opinion of the infamous 'Great Lengths' Extensions!

First of all... here's my little pea head after I got them taken out!


As you can see, my hair is quite thin. It had grown a good bit since I'd got my Great Lengths in first, but obviously I had to get a quick trim to get rid of the tail ends. It's now nice and healthy again.

So let's get down to bidness...

How long do they take to apply?
I was in the hairdressers at 9am this morning & was finished at 3pm - I know, that sounds outrageous, but my hairdresser is heavily pregnant - I'm talkin' 5/6 weeks to go - and had to take frequent breaks. I didn't mind though because I always get my hair done with the same person and I trust her with the wellbeing of my fro! The also went out and got lunch for me, so I can't complain. Food in my belly = happy Grace.

Do they blend well with your own hair?
As you can see from the pictures below, hells yes. I get 4 different tones in my hair so that the colour of the extensions blend in with my own balayaged hair. I get the full head of extensions, which consists of 150 strands. This covers about one-third of the head but blends perfectly! An added bonus is the fact that the texture of the Great Lengths extensions is actually the same as my own hair - this wasn't the case with the extensions I wore before!


Do they last long?
Mmmmhmmm, of course they do! I think most people get about 5 months out of their extensions! Unlike other individually bonded extensions that I'd had before, only 1 of the Great Lengths strands fell out in the time that I'd had them in! I'm convinced that this is something to do with the bond itself! Super strong and durable as long as you treat them with a bitta TLC!


Here are the extensions up close! The bonds are pretty much invisible, which makes it great when you're tying your hair up! They also lie really flat to your head so you don't get that weird bumpy thing happening where it looks like you've got things stuck to your scalp! Haha. Obviously this is super zoomed in, so you never actually see the difference between the extension and your own hair, it simply looks like highlights / balayage!


Are they easy to maintain?
So easy! You get a little leaflet that tells you the ins and outs of how to take care of them! There are special shampoos and hairbrushes that you use to help maintain the quality of the bond so that you don't start shedding random strands of hair when you're walking down the street! Haha. Also, they're very easy to style!


How much are they?
This is the one question I hate getting asked... it's also the one downside to these extensions!
Unfortunately mine cost a small fortune and this will be the last time that I'll be able to afford to get them done, no matter how much I love them! I can never answer this question straight because depending on what you're looking for from them (aka. length & thickness), the price is going to vary! The best thing to do would be to go search for the nearest salon that applies them and ask for a consultation! To give you an idea, I think prices start at €700 and go upwards from there, again depending on what is right for your own hair and what you want!


Lastly... are they worth it?
If you are as self conscious about your hair as I am & are willing to shell out the money on Great Lengths, I would say it's worth your while. There is absolutely no doubt in my mind that you'll love them! This is my second lot of these extensions & unfortunately I just can't justify getting them re-done after Christmas, only for the reason that I've got other things that I need to spend my money on! My hair is growing quite quickly with these extensions in too, so by the time Christmas comes around I'm hoping to have a bit more length in my own hair! Again though, if you have the money & you're willing to spend it on them, you will definitely fall in love with them!

Have you ever tried out Great Lengths Extensions?
Do you wear extensions yourself?

Let me know in the comments!!

XO, G.


Follow Me Fellas & Felines!
Share:
© Grace D | All rights reserved.
Custom Blog Design by pipdig